
A first-time skydiver feels scared and nerve-racked before the first tandem jump. Taking a leap into the unknown creates a cocktail of anxiety and uncertainty that is not normally faced in day-to-day life. Knowing the process will make you feel safer.
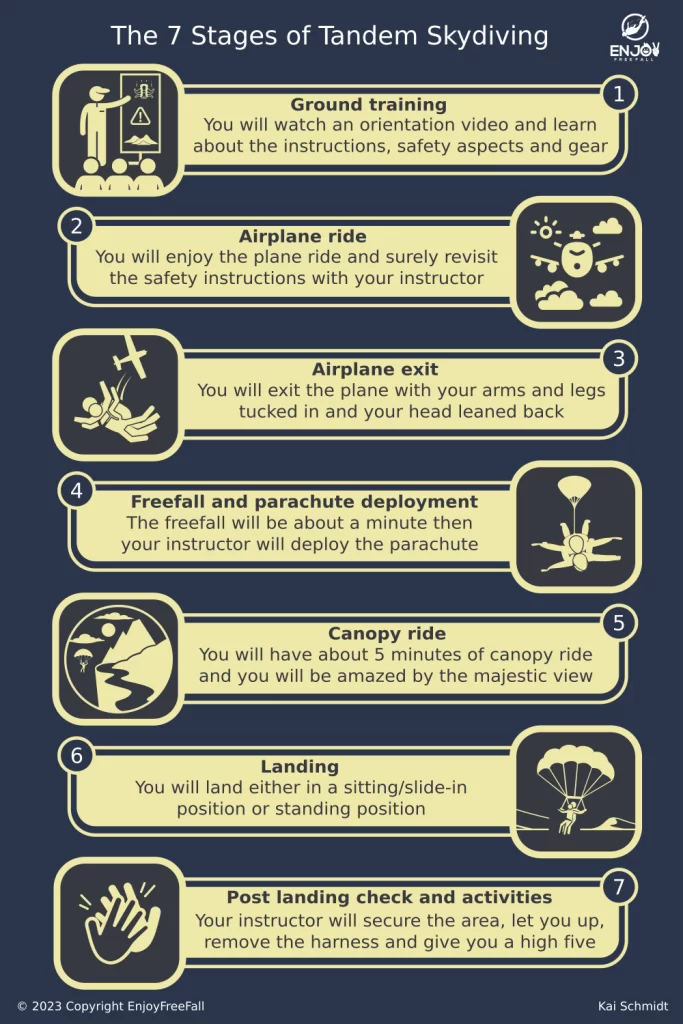
The tandem instructor is attached to the tandem student and is responsible for the overall safety of the jump during the airplane ride, the subsequent freefall, the canopy ride, and the landing. Here are the 7 steps of a tandem skydiving jump:
- Ground Training
- Airplane Ride
- Airplane Exit
- Freefall and Parachute Deployment
- Canopy Ride
- Landing
- Post Landing Activities
Here is the entire sequence of steps that you will experience in your first tandem skydive. Always remember: Even though the tandem instructor is responsible for the jump and your safety, you will also need to do your part!

Step 1: Ground Training
Tandem skydiving requires a brief ground training which consists of 2 phases normally lasting for about 25-30 minutes before you can take your first jump.
First, you will watch a 5–10-minute video orientation on Skydiving-101 (from pre-jump to landing) which will include the dos and don’ts of skydiving. This orientation is designed to show you how to exit the aircraft correctly, how to achieve the correct body posture during freefall, and where and how to make the perfect landing.
You will also have to undergo 20 minutes of physical training with a certified tandem instructor who will conduct a safety briefing and equipment introduction.
The safety briefing will include the things that you’ve learned from the orientation video like how to safely approach and board the aircraft, how to arch your body like a banana while on a freefall, and how to lift your legs during landing.
During the equipment introduction, the tandem instructor will give you a jumpsuit, goggles, a helmet (frap hat), and a student harness. He will also explain the purpose of each piece of equipment and how to wear it properly:
- The jumpsuit will protect your body during landings as well as protect your clothes from damage and possible dirt.
- The goggles are used to shield your eyes from strong winds while on a freefall and to secure your contacts or prescription eyeglasses.
- The frap hat helps in managing unruly hair and allows you to look more professional in pictures and videos.
- The student harness will be used to attach you to your instructor’s harness.
Are you still on the edge whether you should get a video of your first skydive or not? Read my article about the 5 reasons why skydiving videos are worth it and how it could preserve these life-changing moments where I talk about the surprising reasons why people don’t regret spending more to get a video of their skydive, especially their first one.
Step 2: The Airplane Ride
During the airplane ride, you can talk to your tandem instructor and other passengers. There is nothing much to do for you other than enjoying the view or revisiting the safety instructions with your tandem teacher. Depending on your level of nervousness the ride can feel like forever.
The duration of the airplane ride will depend on two things.
- The type of aircraft used; and
- The exit altitude, which differs from one drop zone to another
The Cessna 182 is the most common type of aircraft used by small skydiving centers. The plane can go as high as 10,000 ft in 20 minutes and can accommodate a total of 4 passengers (equivalent to 2 tandem pairs).
Bigger centers have twin-turbine aircraft like De Havilland Twin Otter which can lift skydivers to a height of 13,500 ft in just 13-15 minutes and can accommodate up to 22 passengers (equivalent to 11 slots).
Others also offer a helicopter ride for a VIP experience and a 360-degree scenic view. Helicopters can climb between 8,000-10,000 ft (double the normal altitude of a helicopter ride) within 15-20 minutes and can fit up to 2 tandem pairs plus a videographer and pilot.
The type of aircraft does not only influence the jumping height, unfortunately it also harms the environment. If you want to learn about the environmental consequences of skydiving and how to reduce them, check out my post about how skydiving affects the environment. It will give you a new perspective in terms of environmental consequences.
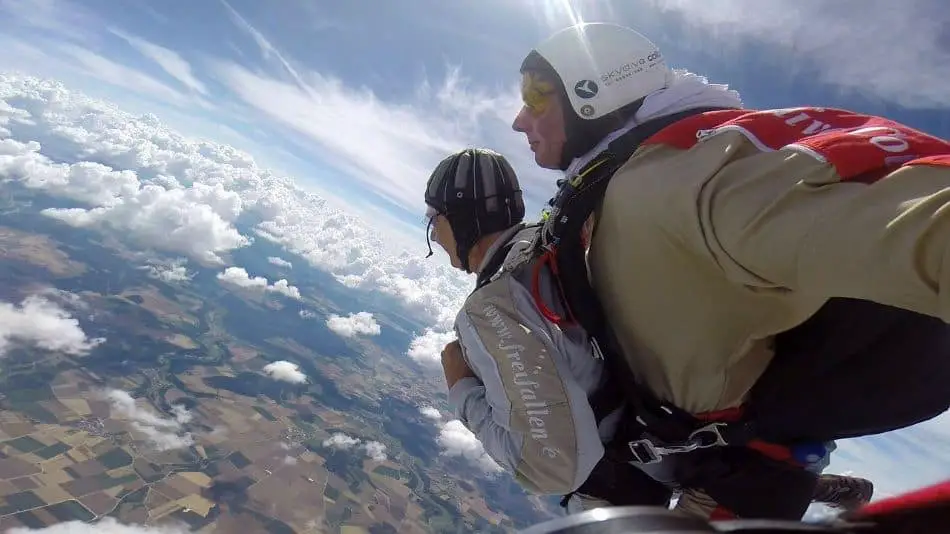
Step 3: Exiting the Airplane
As a tandem jumper, you will exit an airplane in either a seated or standing position. Your tandem instructor will determine your best exit position based on safety considerations like the direction of the wind and its relative speed.
As a tandem student, you need to make sure that your arms and legs are tucked in and your head is leaning back against your instructor’s chest so that your body will be in an arch position. This will ensure your stability during freefall.
As you exit the airplane, you and your instructor will either face toward the front or go on a dive exit while facing the tail of the aircraft. The instructor will then release the drogue so that you will be in a stable belly-to-earth position and manage your freefall speed to stabilize at around 120 mph.
Step 4: Freefall & Parachute Deployment
Depending on the chosen drop zone, tandem jumps normally have an exit altitude of between 10,000-14,000 ft (3,000-4,300 m). After a few seconds, you will reach a terminal velocity of 120 mph and your freefall will last for about 40-60 seconds.
An exit altitude below 10,000 ft is not recommended as it will shorten your freefall time preventing you from fully enjoying the skydiving experience.
Most tandem instructors will deploy your parachute at an altitude of 5,000-6,000 ft (the minimum recommended height for parachute deployment is 4,000 ft.) This height gives your instructor roughly an extra 16 seconds to resolve any possible malfunction.
You can be assured that qualified tandem instructors have undergone rigorous training to handle emergencies and are prepared to resolve adverse issues in a matter of seconds. As they have performed hundreds or even thousands of jumps they know perfectly what is required.
If for whatever reason, the main parachute does not open, the tandem instructor will initiate the emergency procedure by cutting away from the main parachute and manually releasing the reserve (backup) parachute.
They are also equipped with an AAD that will automatically deploy the reserve at a preset altitude. Given all that, statistically speaking, tandem skydiving is approximately 2.5 times safer compared to solo skydiving.
If you want to learn more about why tandem is safer than solo skydiving, please click on this post.
Step 5: The Canopy Ride
The length of the canopy ride will depend strictly on the altitude of parachute deployment. Sometimes the instructor will let you steer the canopy, which is a lot of fun.
You will descend at a rate of 1,000 ft for every minute (17mph) but this rate can be shortened simply by doing spiral turns or turning left and right. Spiral turns are not for everyone: they either make you feel unease in the stomach or you can enjoy them.
If the parachute was deployed between 5,000-6,000 ft then you can expect at least 5-6 minutes of canopy riding which is more than enough time to be amazed and blown away by the majestic view around and under you.
Before the jump, the tandem instructors might ask you to choose between a longer freefall or a longer canopy ride. Your choice should depend on whether you would want to fully experience skydiving or if you just want to relax and enjoy the breathtaking view.
If you are looking for great scenery during your canopy ride, make sure to read my article revealing the 15 best and most memorable wingsuit locations worldwide. Even though the article focuses on wingsuit spots, you can often go tandem skydiving there as well!
Step 6: Landing
There are two ways to land when tandem jumping – either by the sitting/slide-in position or by the standing position. Either way, it is your tandem instructor who will determine the safest landing approach for you that is applicable during that time.
The sitting or slide-in position is the most common and safest landing approach for tandem skydiving because it is less prone to causing injuries such as ankle and knee sprains, ligament tears, and contusions.
This position can easily be achieved by the tandem student by simply lifting their legs with their toes pointing up while sliding on their backsides or buttocks.
The other option is the standing position, which is a less common technique in tandem jumps but widely used by experienced solo skydivers because it involves rather accurate landing skills.
The standing position is not ideal for first-time skydivers since tandem instructors will also consider the number of jumps that you’ve had and your prior experience before deciding whether to execute the standing landing.
In the standing position, the tandem instructor steers the canopy in position and then breaks into a run to keep balance once his/her feet touch the ground. Once the instructor is stable on the ground, he or she will inform you to put your feet down.
Step 7: Post Landing Requirements
Once you’ve successfully landed on a sitting or slide-in position, it is important to avoid standing up immediately as your instructor will first need to perform a quick check of the surroundings to ensure that there are no skydivers approaching your direction.
Once they give you the all-clear, you can stand upright and wait for your instructor to remove the harness under the safety guidelines (Do not attempt to do it yourself).
That said, be sure to check out my skydiving 101: everything you need to know about your tandem landing. In this post, I explain everything you need to know about the landing including what mistakes you should avoid as a tandem student to ensure a safe landing!
Your instructor is likely to greet you with a big smile, and a high five, and ask how you felt regarding the whole skydiving experience. Enjoy the moment!
Overall, the tandem instructor is responsible for your safety throughout all stages of the jump be it before, during, or after the dive. However, as a tandem student, you are also expected to fully cooperate with them to have the best and most amazing skydiving experience.
Enjoy your freefall during your first tandem jump!

